Modifying Receipt
There are 2 options to modify a receipt, the Receipt Header (POS.3.3) and the Receipt Trailer (POS.3.4)
Select one of the options mentioned depending on what data you wish to modify.
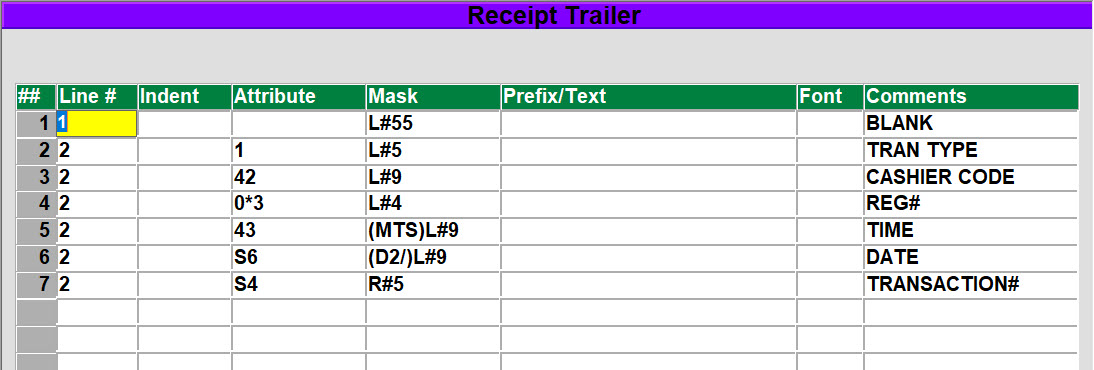
Select the Header or Trailer code you wish to modify, in the example below I am modifying the receipt trailer and the code of MAIN, this is the name of the primary header and footer used for the standard SA transaction type.
On main portion of the screen is the standard message that will print on the bottom of the receipt. You can change the message as needed. Keep in mind of the width of the receipt paper and that approximately 40 characters wide.

Selecting the ‘V=Variable Text’ at the bottom of the screen is where you can modify the receipt number information. This is usually best if you leave that to support as you need to know what attributes to use.
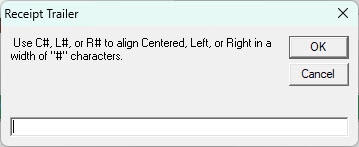
After making changes to the receipt information, you will need to ‘Align’ the information, select the ‘A=Align Text’ and then enter the alignment option (C = Center, L=Left, R=Right) followed by the paper width. The most common option here is to enter C54 since the paper is 54 characters wide.